Setting up the Merlin integration allows CoVet to automatically sync appointments and medical records between your practice management system and your CoVet workspace.
Once the Merlin integration setup is complete, you’ll be able to import cases, link them to Merlin appointments, and export records back to Merlin with ease.
There are multiple articles that will help you with different aspects of the Merlin integration.
Use these links to jump between these articles quickly.
Important to read before using the integration
How to use the integration following set-up
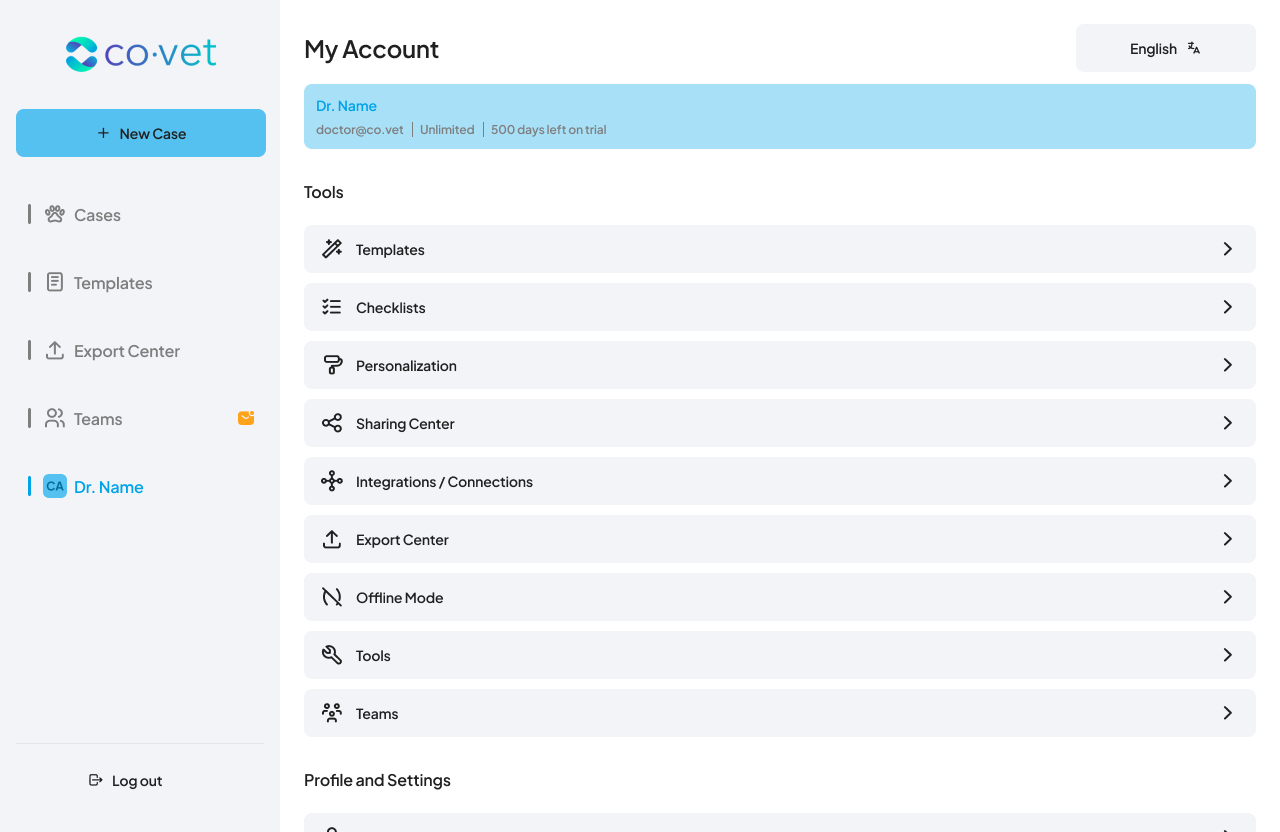
1. Navigate to Integrations from the My Account page
Click on your name in the top navigation to open the My Account page. Once there, select Integrations/Connections from the available menu options to proceed.
2. Select and configure the Merlin integration
Click the Connect button located under the Merlin tile.

3. Review the steps for the integration process
The next screen will clarify the steps needed to set up an integration with CoVet. Please review these steps and the links to any limitations with this Practice Management Software:


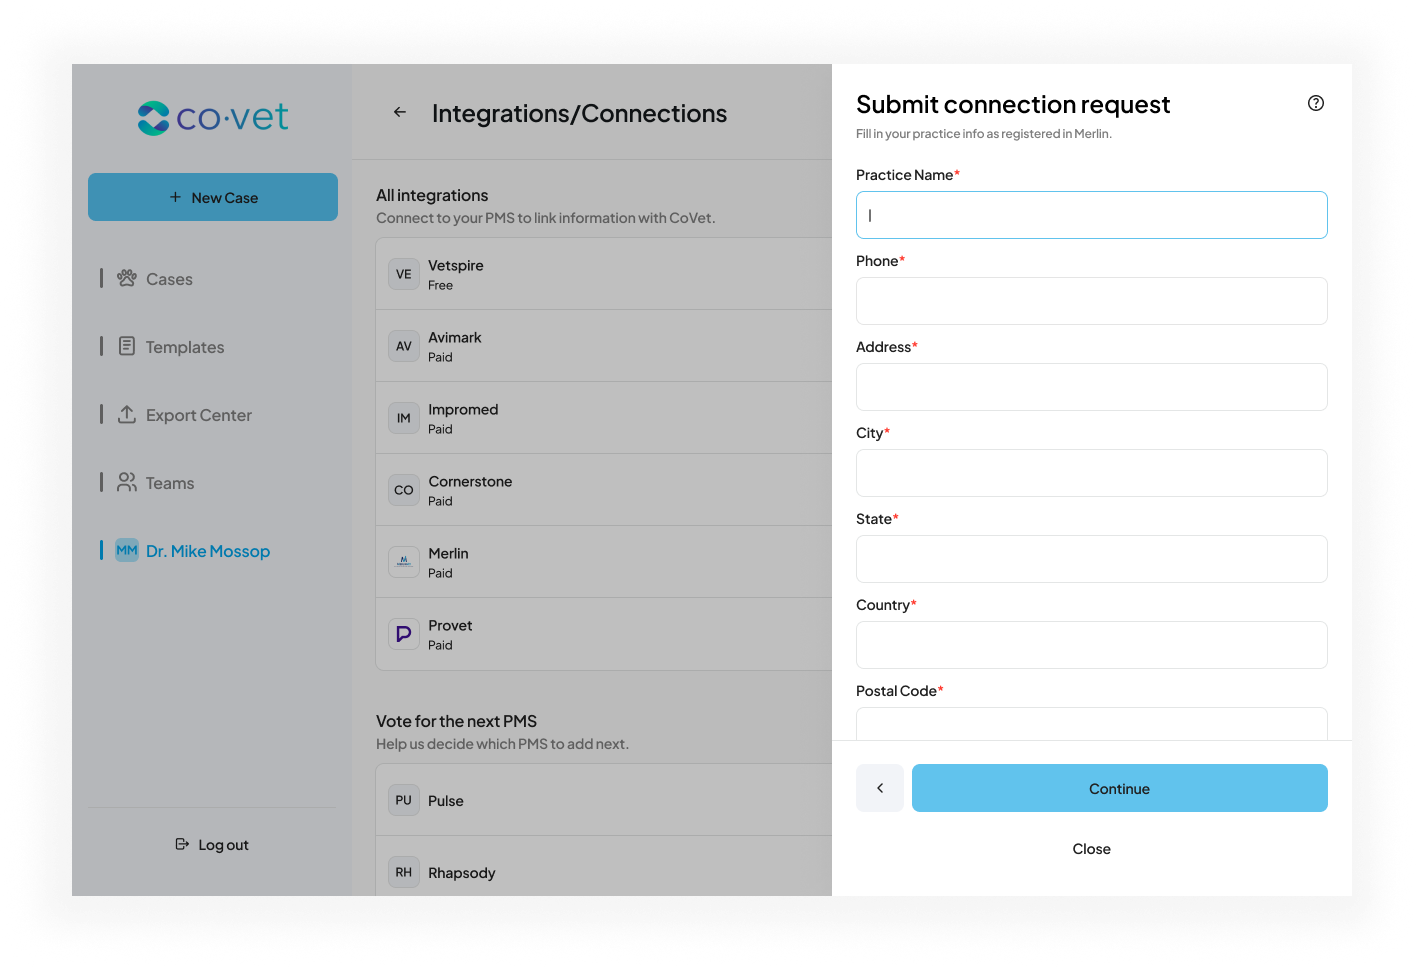
4. Fill out the Connection Request with Merlin
In this screen, fill out the necessary information to link your CoVet account to your PMS. The practice information must match what is in your PMS.
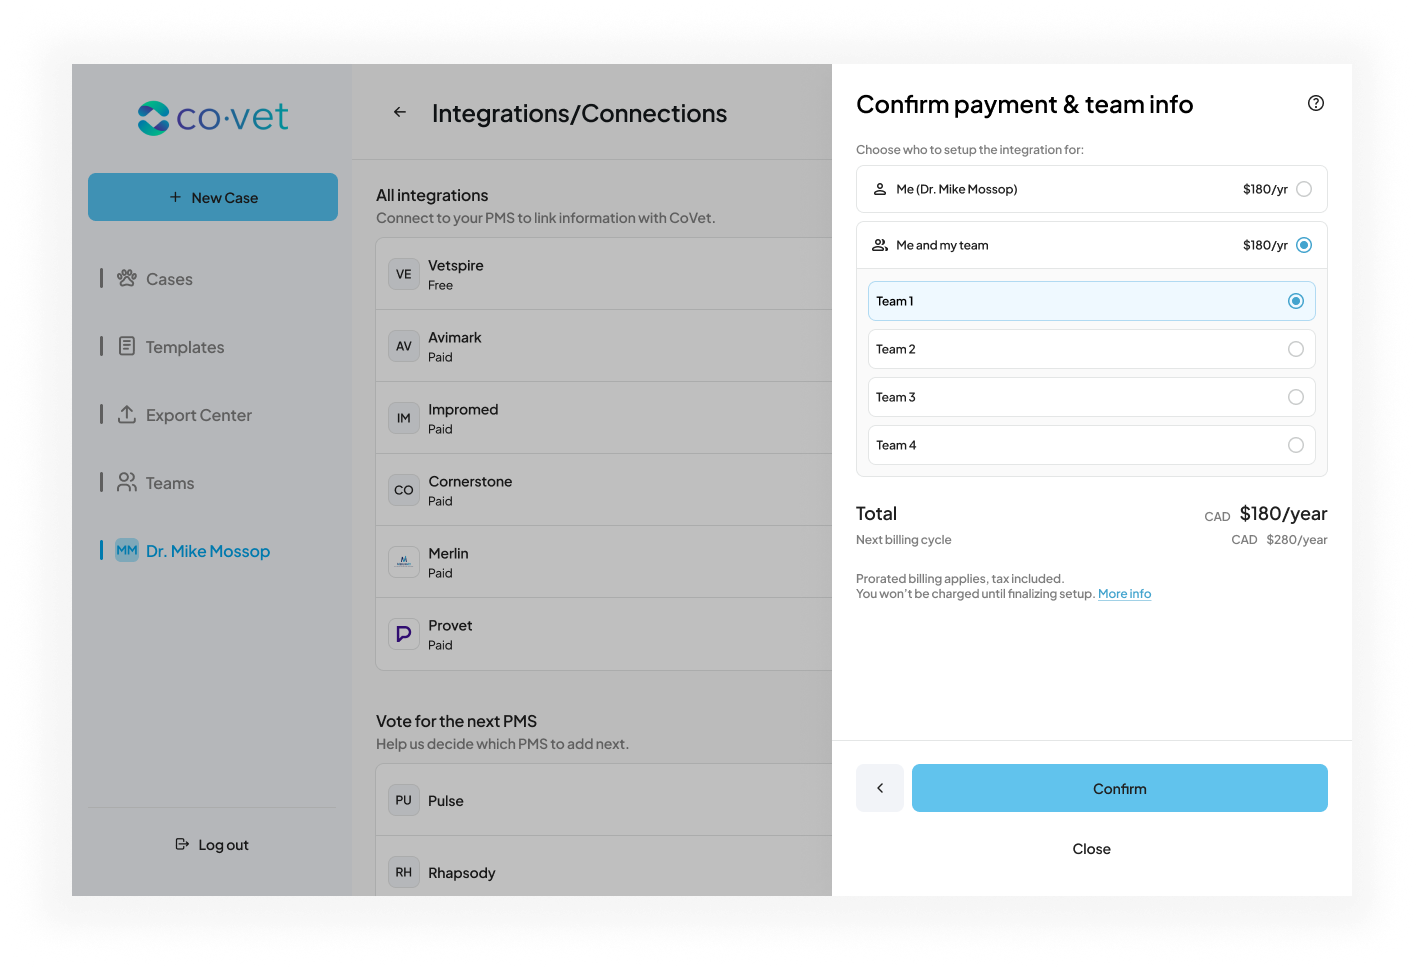
5. Confirm the paid Integration with Merlin
In the next screen that appears, indicating you are configuring a paid integration with Merlin, review and note the associated charges. Ensure to set this up for your team, if you are a part of one. Once ready, click Confirm to proceed.
Important note about pricing
The price shown in the image is not representative of the actual cost for your clinic.
Pricing is based on a monthly fee of £23 GBP per Merlin server, as is not affected by the number of users.
This integration fee will appear on your usual CoVet invoice and will renew according to your regular billing cycle (monthly or annual) until the integration is deleted. This cost will be prorated, and you will not be charged until Merlin approves the integration.
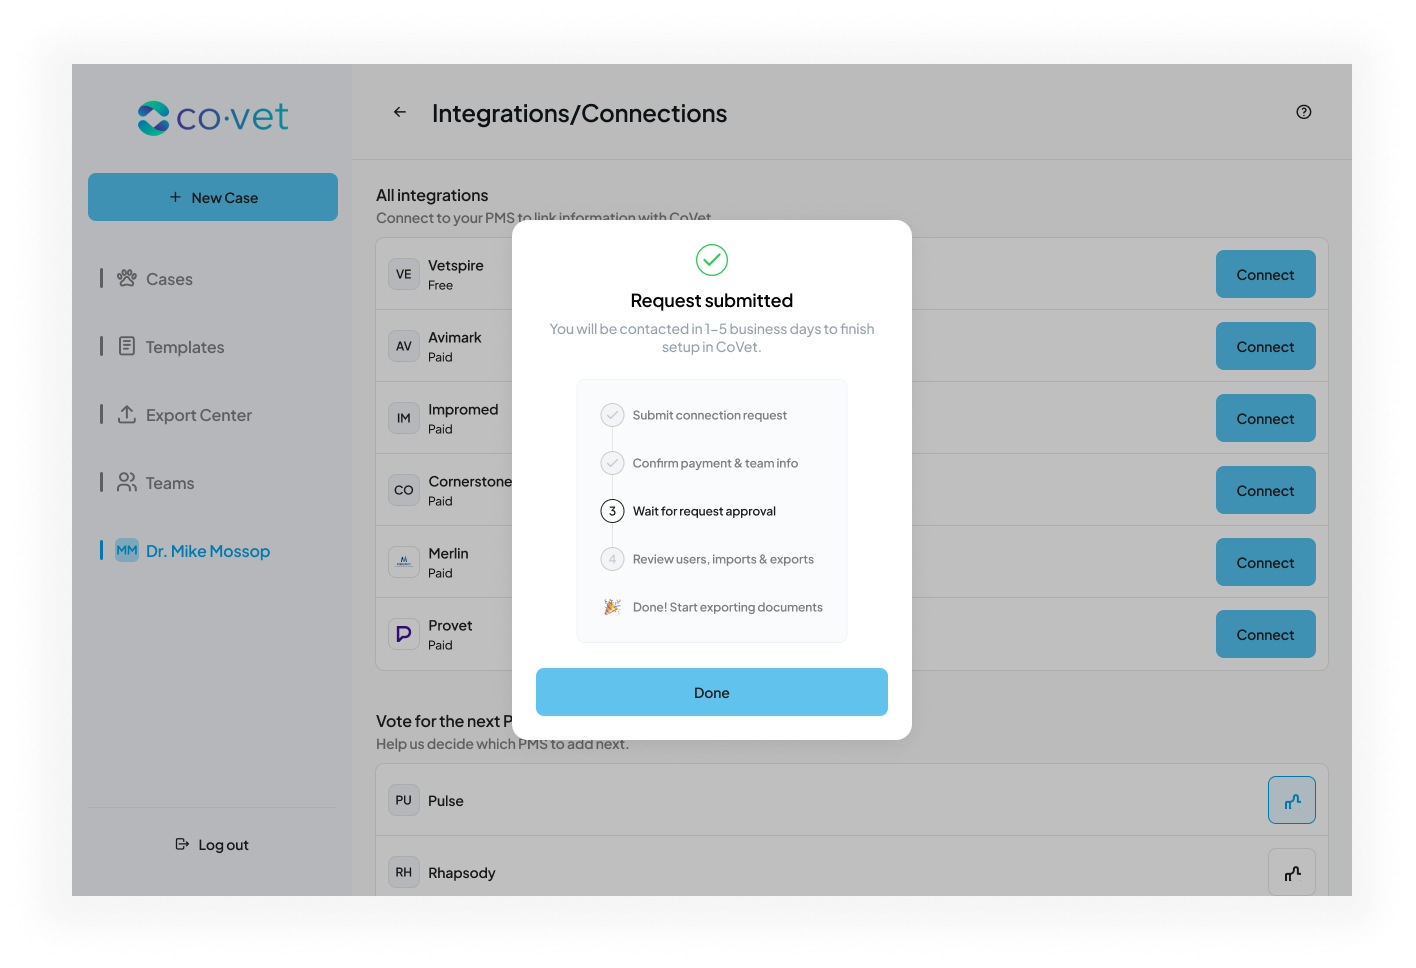
6. You'll receive confirmation your integration request has been submitted
Wait for processing and activation
After this confirmation step, you may need to wait one to five business days before proceeding. During this time, your information request is sent to Merlin, who will contact your clinic directly to complete the necessary steps.
Once this process is finished, CoVet will receive the required information, and you will receive a notification when your Merlin integration is activated.
7. Proceed when you see the "Start setup" indicator
After receiving the activation notification, you will see this pop-up the next time you log into CoVet. You can click the blue Start setup button or go to the integrations screen. The Merlin tile in the integrations screen will now display Start setup.

8. Match your CoVet Account Names to the Merlin Users
In this screen, match up the members of your Team on CoVet with how they appear in Merlin. If you do not use Rooms, feel free to leave this blank.

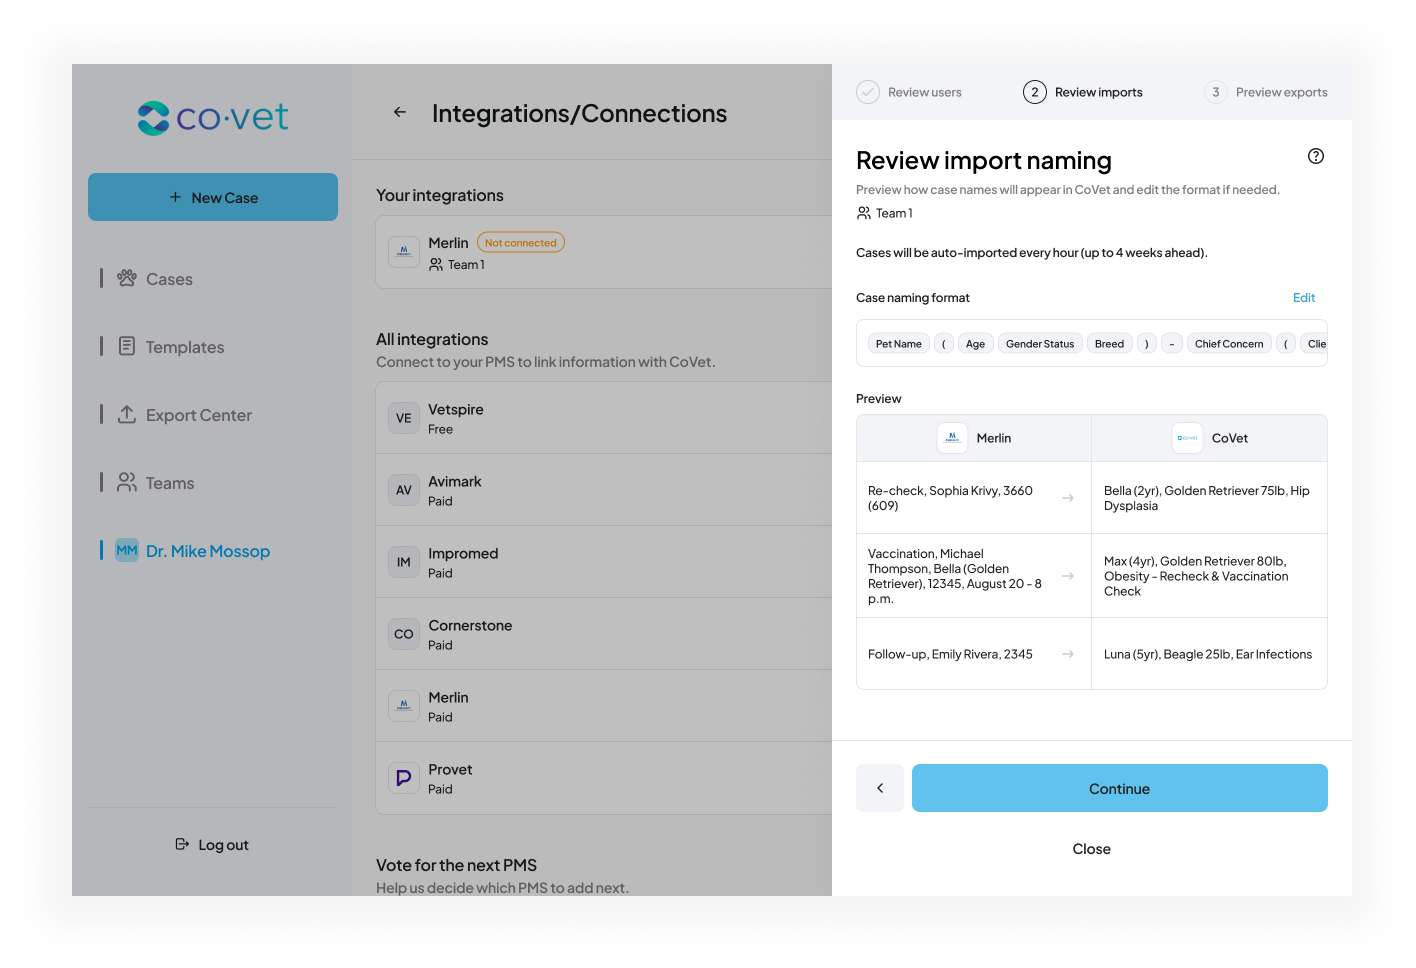
9. Review how imported appointments will appear
On the next screens, you can review how the names of your appointments from Merlin will appear when they are imported into CoVet. The first screen lets you review the case names with a few previews of some connected appointments. You can edit the case naming format here by clicking Edit.
10. Review how exported cases will appear
This screen shows a sample of how your notes in CoVet will be exported back into Merlin. If you wish to make any changes to the areas your notes will export to, you can click Edit fields.

11. Complete setup and start using the Merlin integration
After previewing your sample export, you will receive a confirmation message indicating that the setup is complete. At this point, your Merlin integration is ready to use.

Was this article helpful?
That’s Great!
Thank you for your feedback
Sorry! We couldn't be helpful
Thank you for your feedback
Feedback sent
We appreciate your effort and will try to fix the article