Setting up the Shepherd integration allows CoVet to import and export essential information from both platforms. Once the integration is enabled, your team can document visits in CoVet and keep patient records aligned with Shepherd.
There are multiple articles that will help you with different aspects of the Shepherd Integration
Use these links to jump between these articles quickly.
There are multiple articles that will help you with different aspects of the Shepherd Integration
Use these links to jump between these articles quickly.
1. Navigate to Integrations
Click on your name in the lefthand navigation bar to open your Profile page.
Once there, select Integrations/Connections under Tools.
2. Select the Shepherd integration
Locate Shepherd and click Connect.
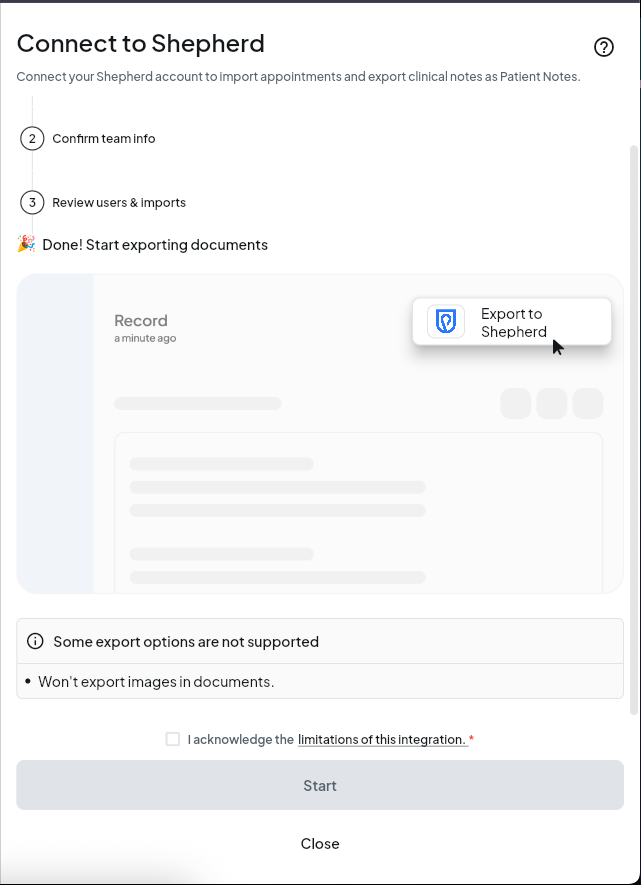
3. Review integration details
You’ll see an overview of what the Shepherd integration supports, including:
- Appointment imports
- Document exports
Review these details before continuing.
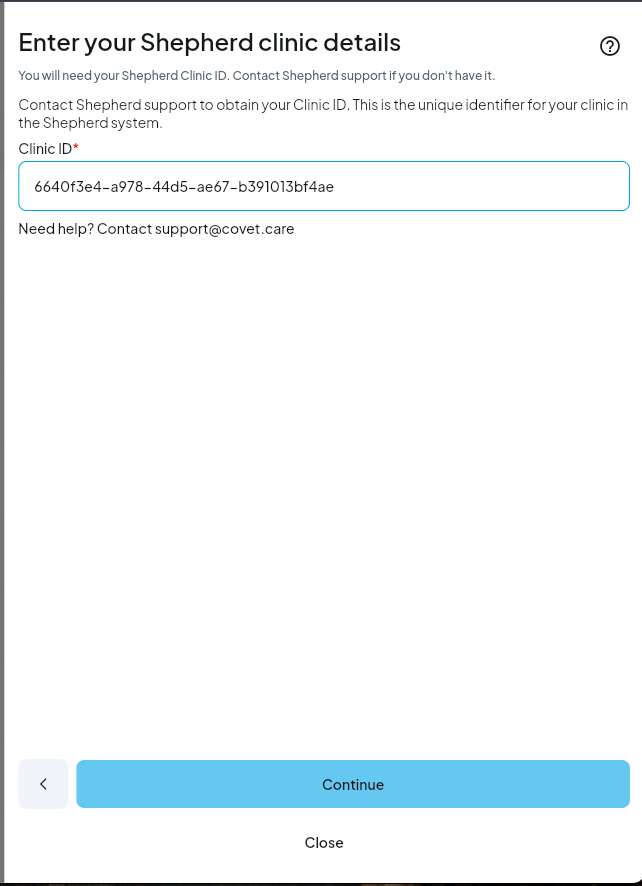
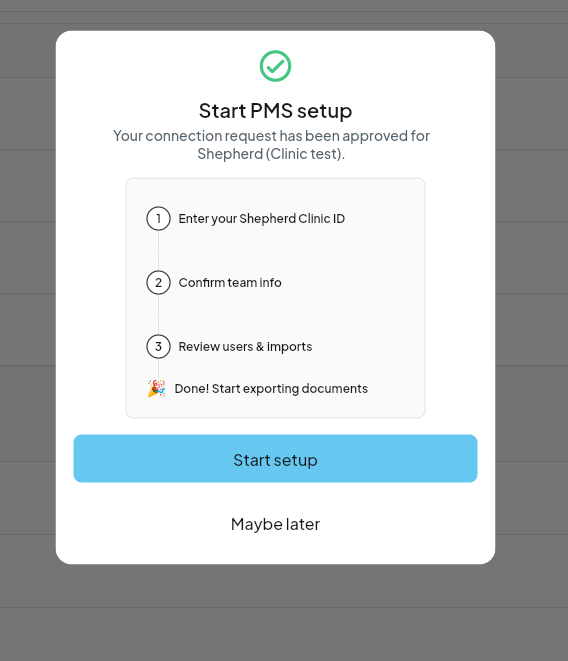
4. Enter your Shepherd Clinic ID
Shepherd integrations are enabled at the clinic level.
To complete setup, you’ll need your Clinic ID, which can be found in Shepherd under:
Admin → Clinic Settings → General Information → Clinic ID
Enter this Clinic ID in CoVet to proceed.
CoVet will validate the Clinic ID by pinging the Shepherd API. If the Clinic ID is invalid, you’ll see an error message with access to support.
The Shepherd integration is free to use and does not require a paid add-on or Shepherd-side approval.
5. Enable CoVet inside Shepherd
Once your Clinic ID is confirmed, you'll be asked to confirm:
- Team info
- Import and export settings
After activation is confirmed, you’ll see a success message in CoVet. If the connection fails after setup, you’ll need to go back and re-activate the integration. Credentials are not saved on failure.
Was this article helpful?
That’s Great!
Thank you for your feedback
Sorry! We couldn't be helpful
Thank you for your feedback
Feedback sent
We appreciate your effort and will try to fix the article